
Installation (Windows)
- Install Miktex from http://miktex.org/
- For GUI install Texnic Center: http://www.texniccenter.org/
- When running Latex for the first time set up pdf and postscript viewer locations (optional)
- For spelling it is suggested to active all the options under: Tools -> Options -> Spelling -> Options (optional)
- Local database for macro files, bibliography files, etc.: It is generally good to generate a local repository of macro and bib files that can be called in different files or even be shared between different users for consistency. This process is explained below.
Local database
- We call the local folder for storing latex style and bib files $LOCALTEXMF.
- To simplify the file sharing between group members I set up my local folder (calling it $LOCALTEXMF) in dropbox:
C:\Users\USERNAME\Dropbox\Shared\latex
- Within this folder there should be a specific folder structure for different files:
- Style files: tex/latex
- Bibliography files: bibtex/bib
- Installing the local latex folder location: The address of this folder should be added to latex installation. This document explains the process.
- Add style files under $LOCALTEXTMF/tex/latex and bibliography files under $LOCALTEXTMF/tex/latex[one_half last=”no”]
 [/one_half]
[one_half last=”yes”]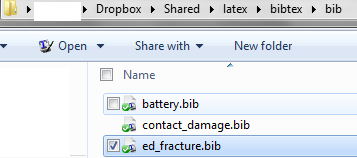 [/one_half]
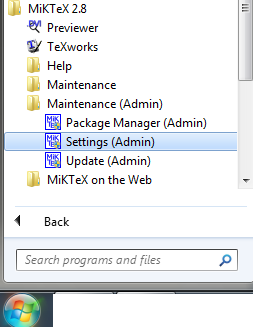
 - Run Miktex setting (admin)
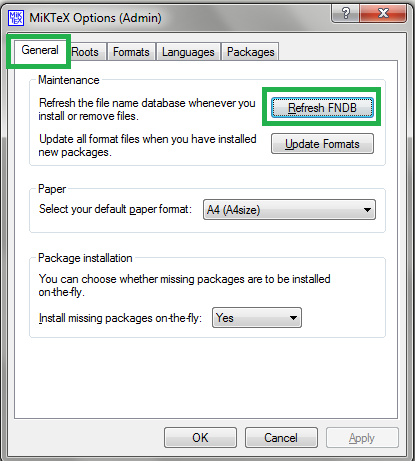
- Add your path to Roots. Note that the trailing \tex\latex\… must not be included

- Afterwards, select General tab and press Refresh FNDB button
- Almost the same process can be followed for TexShop.
- Note that step 4 should be repeated after the addition of any new files to $LOCALTEXTMF.
Bibliography
- When downloading papers save the .bib file from the database with the same name (example here: remove .txt extension).
- Add the contents of the bib file to appropriate bibliography with an appropriate item title such as author:year (example: remove .txt extension).
We currently have a shared folder in dropbox under the address: Dropbox\Shared\latex\bibtex\bib for this purpose. - Cite the papers with their title in the text with \cite{title}, \citep{title}, etc. depending on the document/journal requirements.
- Insert bibliography database files and bibliography style at the end of tex file before \end{document}. Example:
\bibliographystyle{unsrt}
\bibliography{elastodynamics.bib}
Macros and Style files
Macros and style files include a list of commands and shortcuts that can be used in tex files. A same macro file can be found at macro.tex (remove .txt from the end).
To use macros:
- Add them to the same folder of your tex file.
- Add the command: \input{MACRONAME} before \begin{document}
It is better, however, to define a style file and store it in the style file location so that all tex files can access it without having a copy of the macro file in the same directory.
To make and save a style file in latex do the following:
- Create a sty file from include file:
- Add
\NeedsTeXFormat{LaTeX2e}
\ProvidesPackage{FILENAME}[short introduction] (e.g. \ProvidesPackage{macros}[2014/02/04 reza macros])
at the beginning of the file. - Add \endinput at the end of the file. Further details about this topic can be found here (especially the post by xport)
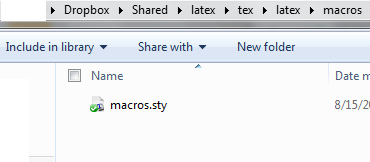
- A sample sty file can be found at: macros.sty (remove txt extension)
- We currently have a shared folder in dropbox under the address: Dropbox\Shared\latex\tex\latex for this purpose.
Figures
Figures can be generated with several programs such as Adobe Illustrator, xfig, inkscape (below), or any other graphical editors. For complicated math symbols it is often recommended to not use the native capabilities of the graphical editor as they may not look professional. There are two general approaches to have highly complicated notations in the figures:
- psfrag tool (home page; pdf documentation) As directly taken from its homepage “psfrag allows LATEX constructions (equations, picture environments, etc.) to be precisely superimposed over Encapsulated PostScript figures, using your own favorite drawing tool to create an EPS figure and placing simple text ‘tags’ where each replacement is to be placed, with PSfrag automatically removing these tags from the figure and replacing them with a user specified LATEX construction, properly aligned, scaled, and/or rotated”.
- Writing expressions in latex and inserting them into the figure directly. There are several tools in windows and Mac for this. In windows the program inkscape can be directly linked to Latex for this approach (as explained below).
Comparison of the two approaches:
Advantage of 1 (psfrag):
- The latex expressions can be modified without modifying the base figure. This provides greater flexibility in changing notations in the figure without changing the base figure.
Advantages of 2 (direct insertion into the figure):
- psfrag should be used with latex compiler (tex -> div -> ps -> pdf) as opposed to the faster and flexible pdflatex compiler (tex -> pdf).
- Adjusting Latex symbols with psfrag can be cumbersome.
- Saving the figure as as stand alone object is more difficult (a tool for this purpose is discussed below).
psfrag tools:
- psfrag2pdf.bat : This program saves psfrag generated figures into a stand alone figure (useful for presentations for example). To use this program do the following:
- Install ghost script from: http://www.ghostscript.com/download/
- If the bin directory is not added to the path add it to the path (type gs on command line cmd to check if gs is recognized). To add a directory to the path follow the instructions here. For example, on my local computer the path is: C:\Program Files (x86)\gs\gs9.02\bin.
- Copy and rename gswin32c.exe to gswin.exe in the bin folder.
- Add psfrag2pdf.bat to the bin folder.
- To use psfrag2pdf.bat follow these steps (all the file can be found here):
- Generate a postscript figure (.eps) file with markers in place of final latex expressions. A sample file is: contactShock.eps (remove txt extension).
- Generate or modify a tex file to replace markers with latex expressions. A sample file is contactShock.tex (remove txt extension).
- In the file location run psfrag2pdf.bat fileName (e.g. psfrag2pdf.bat contactShock) to generate the pdf file (sample contactShock.pdf).
Direct insertion latex in figures
As mentioned there are many programs allowing direct insertion of latex expressions into figures. One very attractive option is the program:
Inkscape (http://inkscape.org/en/):
- Installation: Described in this document by James Davis (if link broken try this).
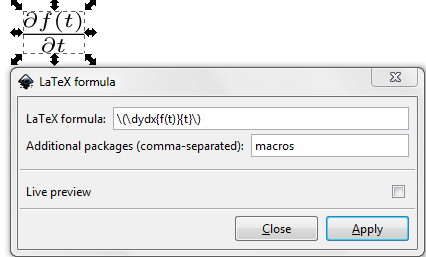
- Typing Latex expressions: Extensions -> Render -> Latex Formula
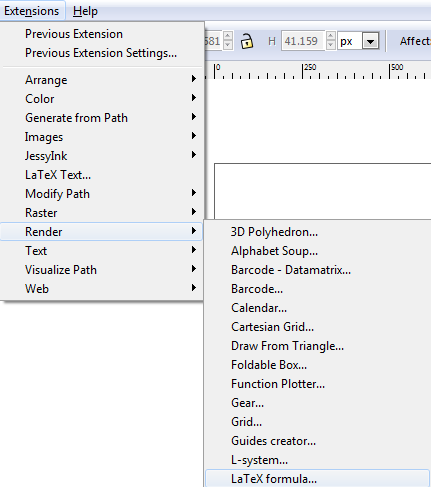 and type Latex math formula enclosed in \( \).
 - Using Latex style files: Sometimes it is easier to use macros to generate Latex formulas. For that the user needs to generate a style file and add it to Latex style location (described above) and call the style name in the latex Formula box:
Presentation (Beamer)
The package beamer class (homepage; documentation – alternative link) is an excellent tool to prepare math intensive presentations. Some useful resource are:
- http://www2.informatik.uni-freiburg.de/~frank/ENG/latex-course/latex-course-3/latex-course-3_en.html
Useful packages
Here is a short list of some useful packages for presentation and article modes:
- Textpos: if exact positioning on some objects is needed in a presentation or poster
- http://www.tex.ac.uk/ctan/macros/latex/contrib/textpos/textpos.pdf
- TikZ and PGF are very powerful packages for a variety of geometry objects in latex. Some interesting examples are